Sprinkler Valve Replacement Signs: When Pop-Ups Fail but Heads Are Fine
Here is a frustrating puzzle for Plano homeowners: a zone of pop-up heads barely rises, sprays weakly, or will not shut off, yet when you dig one up and inspect it, the head itself looks fine. The nozzle is clean, the seal is good, and nothing is cracked. In that situation, the problem usually lives somewhere you cannot see it: the valve buried in a box near your flower bed. This guide walks through how to confirm that the valve is the culprit, and what sprinkler valve replacement involves if it is.
This matters for more than a brown patch of grass. A valve that will not close keeps pushing water into the zone even after the controller shuts off. That is how you end up with standing water near the foundation, mud by the flower beds, and a water bill that climbs for no clear reason. According to U.S. Environmental Protection Agency (EPA WaterSense), a household with an automatic landscape irrigation system that is not properly maintained can waste up to 25,000 gallons of water annually. A stuck valve is one of the most common ways that waste happens.
Work through the steps below in order. Each one rules out a cheaper, simpler cause before you commit to replacing a valve.
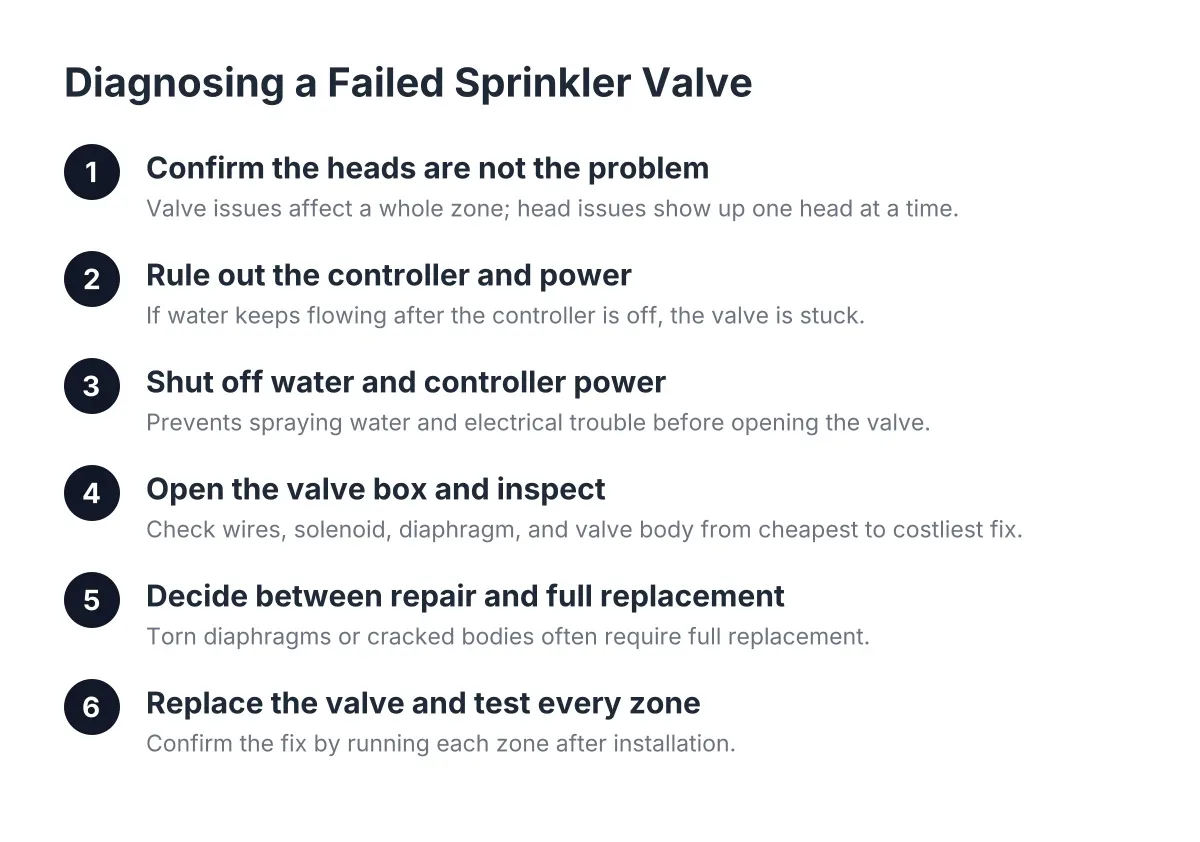
Step 1: Confirm the Heads Are Not the Problem
Start at the heads, because head problems are the easiest and least expensive to fix. Walk the zone while it runs and look at each pop-up.
A pop-up spray head that rises but produces no spray is usually a clogged nozzle or a missing or clogged filter screen, not a valve issue. A head that gushes water from its base instead of spraying from the top often has rocks or debris lodged inside the riser body. Those are sprinkler head repair jobs, or at worst a sprinkler head replacement, and they do not point to the valve.
However, if the heads are clean and intact and the whole zone still behaves badly together, keep going. Valve problems affect the entire zone at once; head problems show up one head at a time. That distinction is the single most useful diagnostic fact in this whole process.
One practical tip while you are out there: when a zone shuts off, pop-up heads retract into the ground and become hard to grab. If you need to pull a head for inspection, lightly clamp pliers around it before the water shuts off so it cannot fully retract.
Step 2: Rule Out the Controller and Power
Next, confirm the system has working water supply and electrical power. The quickest check is simple: do the other zones run normally? If every zone is dead, suspect the controller, a tripped breaker, or a closed shutoff valve, not one bad zone valve.
Here is the insight that separates a controller problem from a valve problem. A zone that keeps running water even after you switch the controller off has a failed valve. The controller only sends an electrical signal; the valve physically opens and closes the water. If the signal is gone and water still flows, the valve is stuck open on its own.
Suppose a homeowner in west Plano notices the side-yard zone never stops. She unplugs the controller entirely, and the zone keeps spraying. In that scenario, no sprinkler system controller replacement will fix it. The valve itself has failed, usually because debris is holding the diaphragm open or the diaphragm has torn.
The reverse also holds. If a zone will not turn on but the controller clicks and other zones work, the problem is either the valve's solenoid or the wiring between the controller and that valve.
Step 3: Shut Off the Water and the Controller Before Opening Anything
Before you touch a valve, shut off the water supply to the irrigation system and cut power to the controller. Opening a pressurized valve sprays water everywhere, and working on a live solenoid invites electrical trouble. Both shutoffs take two minutes and save a soaked afternoon.
If you are not sure how to turn off a sprinkler system, look for a dedicated shutoff near where the irrigation line tees off the main water line, often near the backflow preventer. In Plano, that backflow assembly is also worth a glance while you are there. North Texas freeze events crack backflow preventers and valves more often than most homeowners expect, and a freeze-damaged valve body shows up as leaks the following spring.
Step 4: Open the Valve Box and Look for the Obvious Failures
Find the valve box, usually a green rectangular lid flush with the grass, and open it up. In North Texas clay soil, expect the box to hold some dirt and maybe water. Clear it out so you can see the valves.
Look for these signs, roughly from cheapest fix to most expensive:
- Loose or corroded wire connections. A wire that has pulled free of its connector will keep a zone from turning on. This is a repair, not a replacement.
- A failed solenoid. The solenoid is the small cylinder with two wires on top of the valve. If it no longer clicks or opens the valve, it can be swapped without replacing the whole valve, and the process is essentially the same across valve brands.
- A torn diaphragm or debris inside the valve. This causes zones that will not shut off or that leak constantly. Sometimes replacing the internal parts fixes it; a sprinkler valve replacement kit with a new diaphragm handles many of these cases.
- A cracked valve body. Water seeping from the body itself, often after a hard freeze, means the valve has to come out. No internal part fixes a cracked housing.
A standing pool of water in or around the valve box every time the system runs is a strong clue that water is escaping at the valve, not downstream at the heads. If you have been blaming poor drainage for a soggy spot near the foundation, check whether a valve box sits in the middle of it first. A true grading or drainage problem may call for a French drain installation, but a leaking valve is a cheaper fix and worth ruling out before any digging.
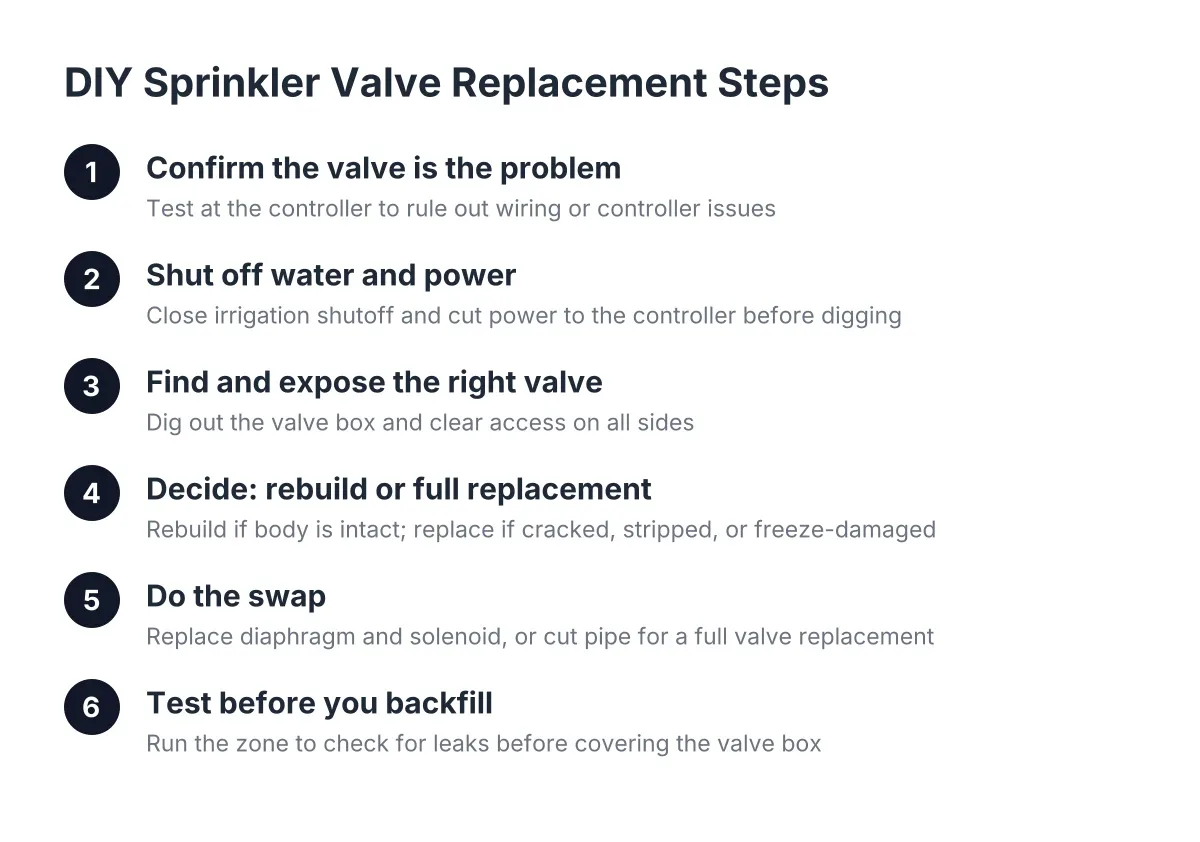
Step 5: Decide Between Repair and Full Sprinkler Valve Replacement
Deciding between repairing a valve and replacing it comes down to what failed. A bad solenoid or torn diaphragm can be swapped with sprinkler valve replacement parts while the valve body stays in the ground. A cracked body, a valve that has failed more than once, or a cluster of valves of the same age all failing in sequence points to full replacement.
Age matters here. Valves in the same manifold were almost always installed on the same day. When one fails from wear rather than debris, its neighbors are often close behind. Replacing one valve on a twenty-year-old manifold can turn into three separate service calls over two summers; some homeowners choose to replace the set at once instead.
Cost follows the same logic. The cost of a water sprinkler valve replacement depends on how accessible the valve box is, whether the manifold was built with unions or glued fittings, how many valves need work, and whether wiring repairs come with it. Glued fittings in shifting clay soil take more cutting and rebuilding than a manifold with threaded unions. Those factors, not the valve part itself, drive most of the price difference between jobs.
Step 6: Replace the Valve, Then Test Every Zone
The replacement itself follows a consistent sequence. With water and controller power off, the old valve is cut or unthreaded from the line, the pipe ends are cleaned, and the new valve is installed facing the correct flow direction. The zone wires connect to the new solenoid with waterproof connectors, which matter in a valve box that holds water after every Plano thunderstorm.
Then comes the part people skip: testing. Run every zone from the controller, not just the one you fixed. Confirm the repaired zone opens on command, closes completely when the controller shuts it off, and holds no pressure leak at the new fittings. Watch the valve box for five minutes after shutdown. A slow seep now becomes a swamp by August.
This is also the natural moment to review the watering schedule. A valve that ran stuck for weeks often hides how long the zones actually need to run. EPA WaterSense reports that as much as 50 percent of outdoor water use is lost to wind, evaporation, and runoff from inefficient irrigation. Matching run times to Plano's watering-restriction schedule after a repair recovers some of what the stuck valve wasted.
When to Call a Sprinkler System Contractor Instead
Some valve jobs are honest weekend projects; others are not. Call a professional for irrigation repair when the valve box has no visible valves because they were buried directly in soil, when wiring faults need to be traced underground, when the manifold was glued with no room to cut in a new valve, or when a freeze-damaged backflow preventer is part of the problem. Backflow work in particular protects your drinking water and should not be guessed at.
There is also a timing argument. If you already schedule a spring start-up and fall shutdown each year, valve checks fold naturally into those visits, and failing valves get caught before they stick open in July. EPA WaterSense notes that a well-managed irrigation system can cut irrigation water use by 15 percent, nearly 7,600 gallons annually. Catching a failing valve early is a large share of what "well managed" means in practice.
The short version: when a whole zone misbehaves and the heads check out clean, stop replacing heads. Look in the valve box. That is where the stuck zones, the mystery puddles, and the rising water bills usually start, and in 2026 a valve swap remains one of the most cost-effective repairs a sprinkler system can get.
If you need sprinkler valve replacement, North Dallas Sprinkler Repair can help.
Prefer to talk it through? Call (469) 639-1022 — a quick call is usually the fastest way to get a straight answer for your situation.