Why French Drain Installation Solves Standing Water in North Texas Clay Soil
If your Plano yard holds water for days after a storm, the problem is probably not your grass, your sprinkler system, or bad luck. It is the clay under your feet. North Texas sits on heavy clay soil that barely absorbs water, so rain and irrigation runoff pool on the surface instead of soaking in. French drain installation gives that trapped water somewhere to go, and it is one of the few fixes that actually works in clay. This guide walks through how a French drain gets installed, step by step, so you understand what the work involves before you dig or hire anyone.
First, a quick note on why clay matters so much here. Sandy soil drains fast; water passes through it in minutes. Clay does the opposite. It absorbs water slowly, holds it, then swells. When it dries out in a long Plano summer, it shrinks and cracks. That swell-and-shrink cycle is the same force that breaks irrigation lines and stresses slab foundations across North Dallas. Standing water near the house makes it worse, because one side of the foundation stays wet while the other dries out.
A French drain works with the clay instead of fighting it. It is a gravel-filled trench with a perforated pipe at the bottom, wrapped in fabric. Water enters the gravel, drops into the pipe, and flows downhill to an exit point away from the house. The clay never has to absorb the water. The drain simply moves it.
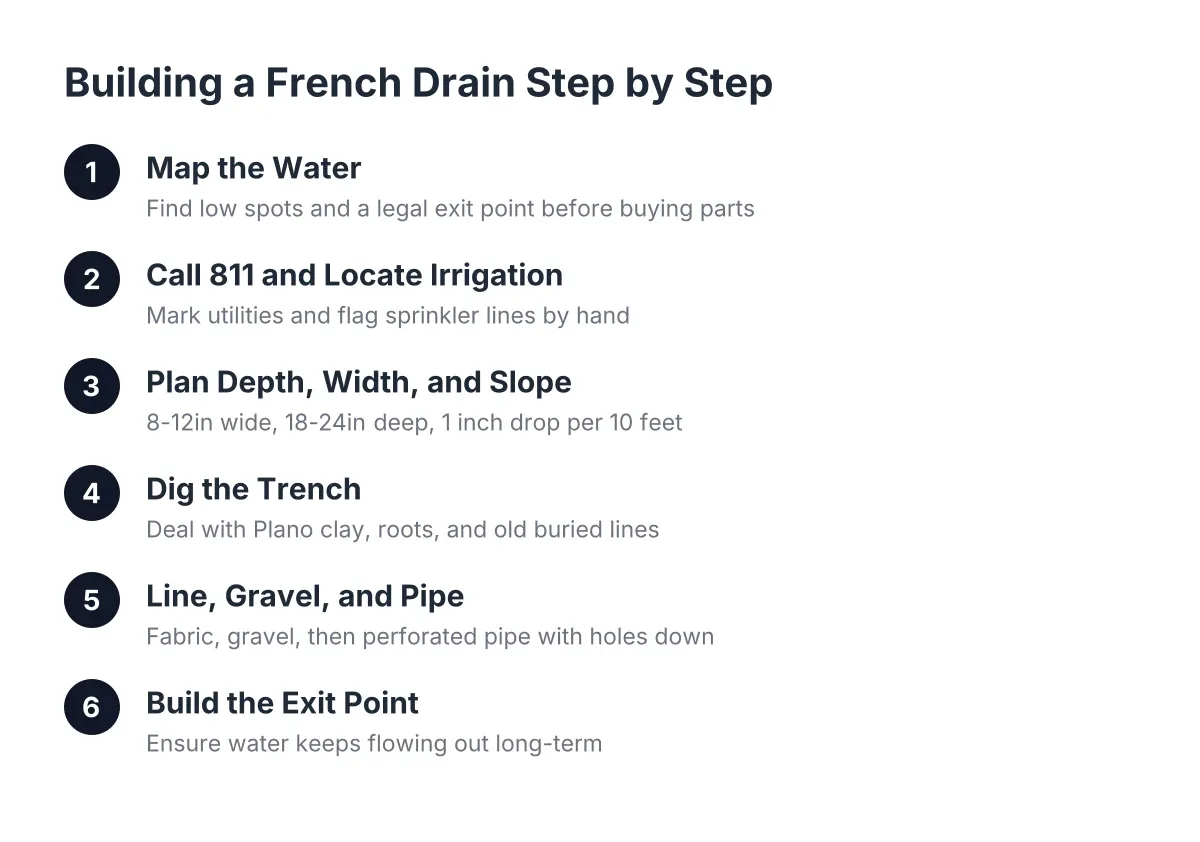
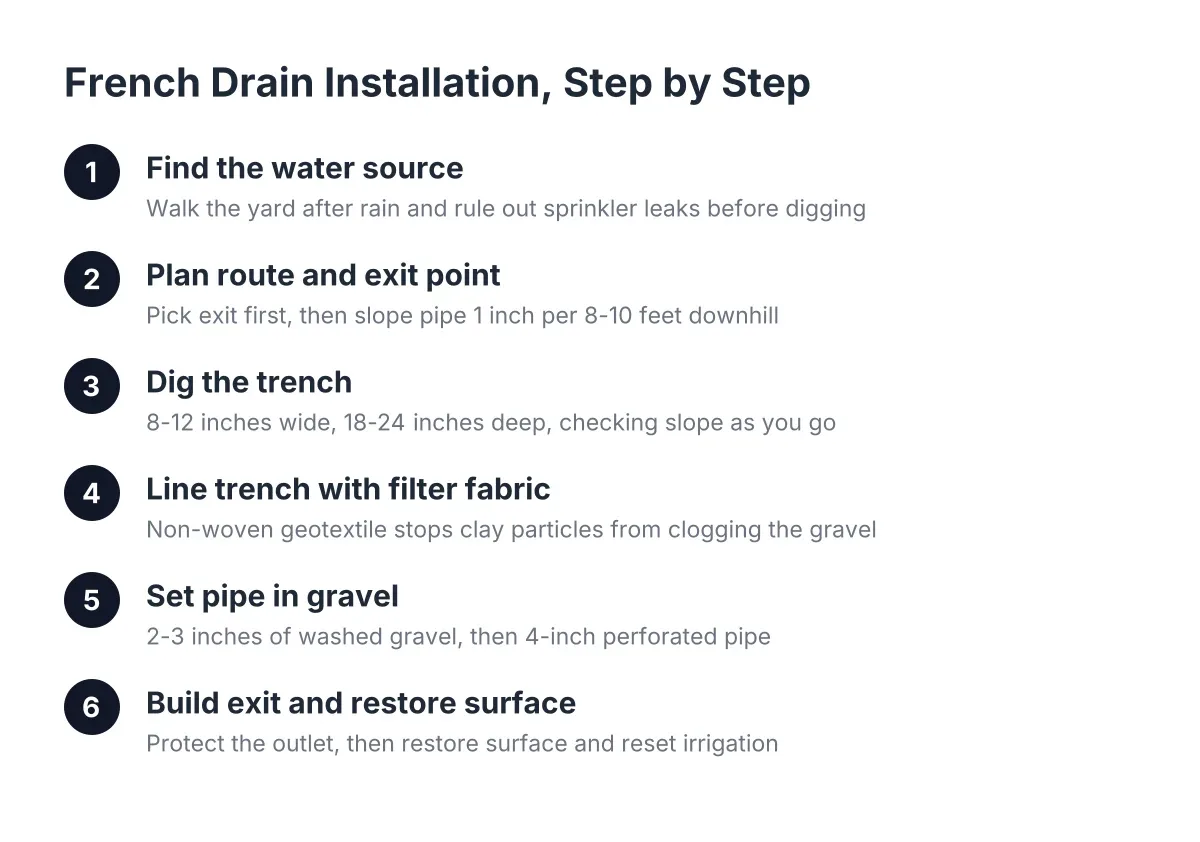
Here is how a proper installation goes, in order.
Step 1: Find Where the Water Comes From and Where It Sits
Before any digging, walk the yard during or right after rain. Note where water pools, how long it stands, and where it flows from. In clay soil, the wet spot is often downhill from the real source, so trace it back.
In addition, check whether your sprinkler system is part of the problem. A cracked lateral line or a leaking valve can keep one patch of lawn soggy for weeks, and homeowners often blame rain for what is actually an irrigation repair issue. If you just bought the house and inherited an undocumented system, this matters even more. Suppose a new-build owner in Plano finds a corner of the backyard that never dries out; in that scenario, a leaking zone line is just as likely as a grading problem, and a properly installed French drain will not fix a broken pipe. Rule out the sprinkler leak first, or you will install a drain that handles a leak you could have repaired for far less.
Also look for signs of recent digging or buried cable work. Utility crews sometimes crimp or crack irrigation pipe without anyone noticing, and the slow leak that follows can look exactly like a drainage problem.
Step 2: Plan the Drainage Route and Exit Point for Your French Drain Installation
A French drain only works if the water has a place to exit. Pick the exit point before you pick the trench route. Good options include a street gutter, a swale that carries water off the property, or a low spot well away from the house and your neighbor's yard. Draining onto a neighbor's property can create a dispute and, in some cities, a code problem.
From the exit point, work backward to the wet area. The pipe needs a steady downhill slope the whole way, about 1 inch of fall for every 8 to 10 feet of pipe. In flat North Texas yards, that slope is the hardest part of the whole project. A trench that looks level to the eye can actually run uphill, and water in a flat pipe just sits there and breeds mosquitoes.
Before you finalize the route, call 811 to have utility lines marked. Also map your irrigation lines if you can. Sprinkler pipe is usually shallower than utilities and does not get marked by 811, so an inherited system with no documentation is easy to slice through with a trencher.
Step 3: Dig the Trench to the Right Depth and Slope
For yard drainage, the trench typically runs 8 to 12 inches wide and 18 to 24 inches deep. If you are learning how to install a French drain around foundation walls, the trench needs to reach near the base of the footing, which is deeper work and higher stakes. Foundation-adjacent digging is a case where a second opinion from a drainage professional is worth the time, because a mistake there affects the slab itself.
Digging in North Texas clay is the part most DIY guides written for other regions skip. Dry clay here digs like concrete. Wet clay sticks to the shovel in heavy slabs. A typical crew uses a trencher or mini excavator for anything beyond a short run, and even then the spoil pile is heavy, dense, and hard to reuse as backfill. Plan on hauling most of it away.
Check slope as you dig, not after. A string line with a line level, or a laser level, keeps the trench bottom falling steadily toward the exit. However you measure it, verify the grade every few feet. Clay trench walls hold their shape well, which helps, but they also hide low spots that trap water later.
Step 4: Line the Trench with Filter Fabric
Lay non-woven geotextile fabric along the trench bottom and up both walls, with extra width to fold over the top later. This fabric is the difference between a drain that lasts 20 years and one that clogs in three.
Here is why it matters more in clay than anywhere else. Clay particles are tiny. Without fabric, they migrate into the gravel with every rain, fill the gaps between stones, and eventually seal the pipe's perforations shut. This is also where most cheap French drain kits fall short. Many kits use a thin fabric sock on the pipe alone, with no trench liner, and fine clay sediment works past it. The drain works the first season, slows the second, and fails by the third. A full fabric envelope around the entire gravel bed is the standard that holds up in North Texas soil.
Step 5: Set the French Drain Pipe in Gravel
Add 2 to 3 inches of washed drainage gravel on top of the fabric, then lay 4-inch perforated French drain pipe on the gravel bed. Rigid PVC with two rows of holes is the sturdier choice; corrugated flexible pipe is cheaper but crushes more easily and sags between support points, creating low spots where silt collects.
Point the perforations downward. This surprises most first-timers, but water rises into the pipe from the saturated gravel below, and holes facing down let the pipe pick up water at the lowest level of the trench. Confirm the slope one more time with the pipe in place.
Next, cover the pipe with 6 to 12 inches of gravel, then fold the filter fabric over the top so the gravel is fully wrapped. The finished layer stack, bottom to top, looks like this:
- Filter fabric lining the trench bottom and walls
- 2 to 3 inches of washed gravel bedding
- 4-inch perforated pipe, holes facing down
- Gravel to within a few inches of the surface
- Fabric folded over the gravel
- Topsoil and sod, or decorative rock if you want a visible drain line
Step 6: Build a Clean Exit and Protect It
The exit point fails more often than any other part of a French drain system. Finish the pipe with a solid, non-perforated section for the last few feet so collected water does not seep back out before it leaves. Add a rodent guard or pop-up emitter at the opening, and set the outlet where mulch, grass clippings, and soil will not bury it.
Therefore, make the exit easy to inspect. Walk out after the first heavy rain and confirm water is flowing. If nothing comes out while the yard is saturated, the slope or the exit is wrong, and it is far easier to fix in month one than in year three.
Step 7: Restore the Surface and Reset Your Irrigation
Backfill the final few inches with topsoil and replace the sod, or dress the line with river rock. If the trench crossed any sprinkler lines, now is the time to repair them properly, flush the lines before reconnecting heads so trench debris does not clog the nozzles, and reset any heads so they sit flush with the lawn surface where a mower will not clip them.
A drier yard also changes what your lawn needs from the sprinkler system. Soggy ground often hides overwatering, and the U.S. Environmental Protection Agency (EPA WaterSense) reports that a poorly maintained automatic irrigation system can waste up to 25,000 gallons of water a year. Once the drain is in, adjust the watering schedule to match Plano's watering restrictions and the lawn's real needs, and recheck zone run times in spring and late summer of 2026 as temperatures swing.
When to Hire Out French Drain Installation Instead of DIY
A short, shallow run across an open lawn is a reasonable weekend project for a homeowner with a strong back and a rented trencher. The math changes when the job involves clay excavation over a long run, a flat yard with little natural fall, a drain near the foundation, or an inherited sprinkler system with unmapped lines in the dig path. In those cases, professional French drain installation costs more up front but avoids the common failure pattern: a flat pipe, a clogged gravel bed, and a re-dig of the same trench two years later.
Either way, the core idea does not change. North Texas clay will not absorb standing water, no matter how long you wait or how much you aerate. A properly sloped, fabric-wrapped drain gives that water a path out, and that is why this fix keeps working here when surface-level solutions do not.
If you need French drain installation, North Dallas Sprinkler Repair can help.
Prefer to talk it through? Call (469) 639-1022 — a quick call is usually the fastest way to get a straight answer for your situation.