Signs Your Plano Home Needs a French Drain System Installed, Step by Step
If you just moved into a Plano home and the backyard stays soggy for days after a storm, you are probably wondering whether the problem is the sprinkler system or the yard itself. Often it is both. French drain system installation solves the water that grading and sprinkler fixes cannot, and spotting the signs early saves you from foundation trouble later. This guide walks you through how to confirm your yard needs a French drain, then shows what a proper installation looks like, step by step, so you know what good work should include whether you do parts of it yourself or hire it out.
North Texas clay soil is the root of most of this. It drains slowly, swells when wet, and shrinks when dry. That movement cracks irrigation lines and shifts slabs. Standing water near the house makes it worse. Here is how to work through the problem in order.
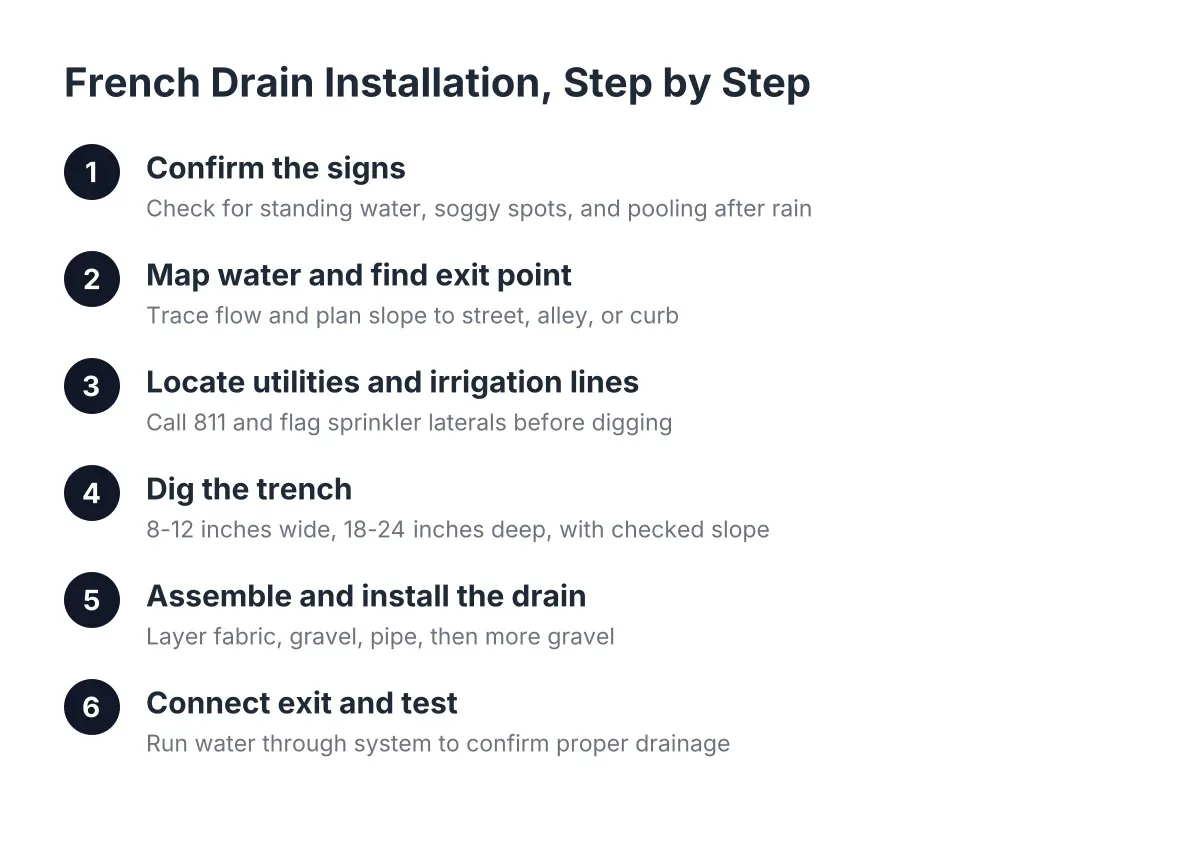
Step 1: Confirm the Signs That Point to a French Drain
Before you dig anything, verify the water problem is real and recurring, not a one-time event or a sprinkler issue in disguise. Walk the yard 24 and 48 hours after a decent rain. These are the signs that point toward a French drain rather than a simple fix:
- Standing water or spongy ground that lasts more than a day after rain
- A low strip of lawn along a fence line or between houses that never fully dries
- Water pooling against the foundation or in flower beds next to the slab
- Mosquitoes breeding in the same spot every spring
- Dead or yellow grass in a swale where water sits, while the rest of the lawn looks fine
- Water seeping into a garage, patio, or crawl space during heavy storms
One caution for new-build owners inheriting a system with no labels or manual: a stuck sprinkler valve or a cracked lateral line can mimic a drainage problem. If one patch of yard is wet while the system has not run, shut the system off at the controller and the main shutoff, then watch that spot for a week of dry weather. If it dries out, you need sprinkler repair, not a drain. Additionally, if it stays wet after rain regardless, keep reading.
Step 2: Map the Water and Find Your Exit Point
Every French drain needs somewhere for water to go. This is the step most DIY projects skip, and it is why many fail. Figure out the exit point before you plan the trench.
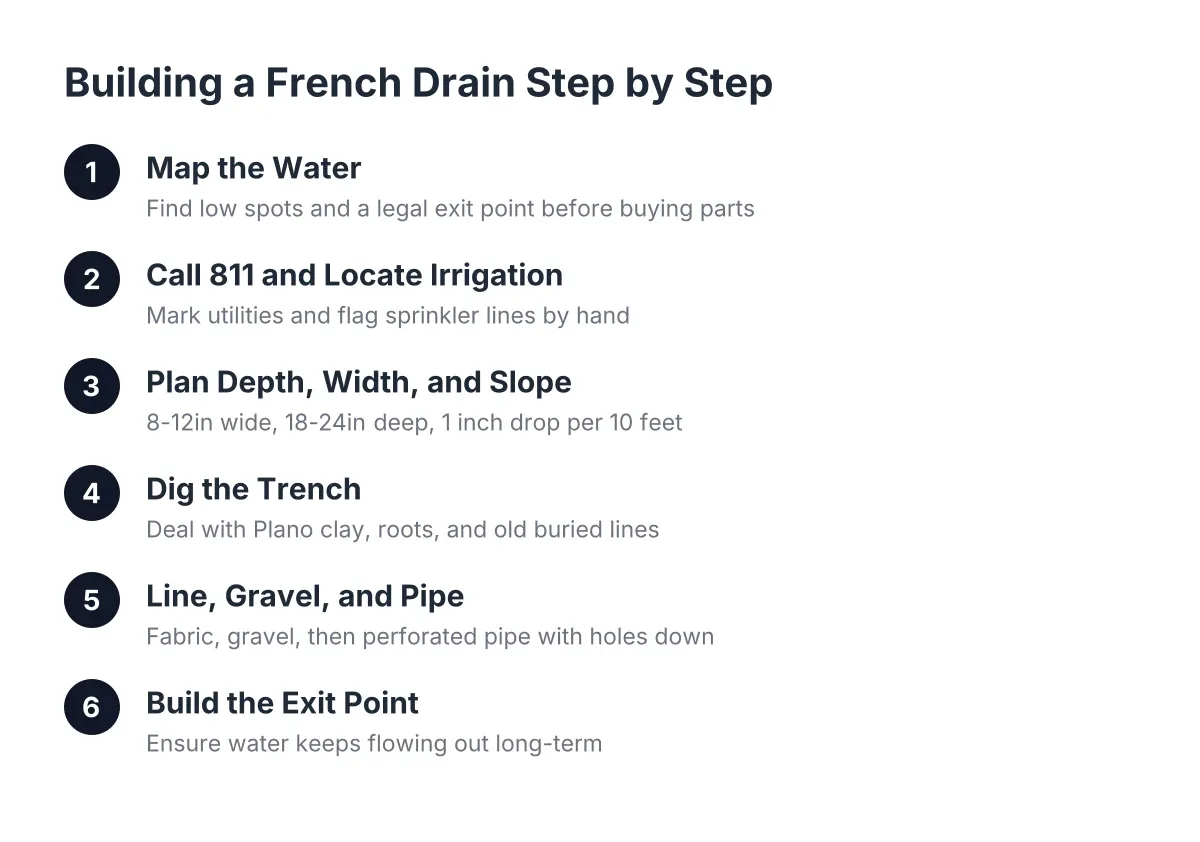
During the next rain, watch where water enters the problem area and where it naturally wants to leave. In most Plano lots, the exit point is the street, an alley, or a curb face at the front of the property. Your trench must slope continuously downhill from the problem area to that exit. A common target is about 1 inch of fall for every 8 to 10 feet of pipe.
Suppose a homeowner in a newer Plano subdivision has a side yard that floods because the neighbor's lot sits higher. In that scenario, the drain would run along the fence line, wrap the corner of the house, and daylight at the curb through a pop-up emitter or a core-drilled curb outlet. If your lot has no downhill path at all, a professional should evaluate options like a sump basin, because a drain with no outlet is just a buried bathtub.
Step 3: Locate Utilities and Your Irrigation Lines
Next, call 811 at least a few business days before digging. The utility locate service marks gas, electric, cable, and communication lines for free. This is not optional; it is Texas law and basic safety.
However, 811 does not mark your private irrigation system, and that matters in Plano where most lawns have one. Sprinkler lateral lines sit shallow, often 6 to 10 inches deep, right where a French drain trench goes. If you inherited the system with no map, run each zone from the controller and flag every head before digging. Also look for seams in the lawn from past cable or internet installs; vibratory plows can crimp a buried PVC irrigation pipe without breaking it, so disturbed ground is a warning sign in more ways than one.
Expect to cut at least one sprinkler line during trenching on most Plano lots. Plan for it. Cut lines need proper couplings and a flush of the zone afterward, because a repaired line that keeps pulling in dirt will eventually clog heads downstream.
Step 4: Dig the Trench to the Right Depth and Slope
Now dig. For most yard drainage in our clay soil, the trench runs 8 to 12 inches wide and 18 to 24 inches deep. Depth and discharge depend on the job: a shallow trench handles surface water in a lawn, while a drain protecting a foundation often goes deeper so it collects water before it reaches the slab.
Check slope as you go, not at the end. Use a line level or a laser, and verify fall every few feet. Clay digs hard when dry and smears when wet, so time the work a few days after rain if you can. Pile spoils on a tarp; North Texas clay stains concrete and kills grass fast if left in heaps.
This is also where honest trade-offs show up. Hand-digging 60 feet of trench through compacted clay is a full weekend of brutal work, and a trencher rental has its own learning curve near irrigation lines. There is no shame in pricing out professional french drain system installation for the trenching alone once you see what the digging involves.
Step 5: Assemble the Drain System and Install It Correctly
A French drain system has four parts that have to go in the right order: fabric, gravel, pipe, and more gravel. A boxed diy french drain kit from a big-box store bundles some of these, but the kits often include thin corrugated pipe and skimpy fabric that clog within a few years in clay soil. Buying french drain parts individually usually gets you better materials for similar money.
Install in this sequence:
- Line the trench with non-woven geotextile fabric, leaving enough excess on each side to fold over the top later. The fabric keeps clay fines out of the gravel.
- Add 2 to 3 inches of washed drainage gravel to the trench bottom.
- Lay 4-inch perforated french drain pipe on the gravel with the perforations facing down, so water rises into the pipe instead of silting through the top. Rigid PVC with drilled holes outlasts flexible corrugated pipe and can be cleaned out later.
- Confirm slope one more time with the pipe in place.
- Cover the pipe with gravel to within a few inches of grade, then fold the fabric over the top like a burrito.
- Finish with soil and sod, or leave exposed decorative gravel if the drain doubles as a dry creek bed.
Skipping the fabric wrap is the single most common failure in a French drain system installation in clay soil. Without it, fines migrate into the gravel, the pipe silts up, and the yard floods again in two or three seasons.
Step 6: Connect the Exit and Test the Whole System
Finally, tie the solid (non-perforated) discharge pipe from the end of the drain to your exit point. Use a pop-up emitter at the lawn edge, an open outlet to a swale, or a curb outlet if your city and HOA allow it. Keep discharge on your own property or to the street; sending water onto a neighbor's lot invites a dispute and sometimes a code complaint.
Then test before you backfill the exit run. Run a garden hose into the upstream end at full flow for 15 minutes. Water should appear at the outlet within a minute or two and flow steadily. While you are at it, run every sprinkler zone and watch the trench line. You are checking that no cut irrigation line was missed, that heads near the trench still sit flush with the mower's cutting height, and that no nozzle got knocked out of position during the work. Misaligned heads after ground work are common and cheap to fix now, expensive to ignore.
Step 7: Set Up Seasonal Checks So the Drain and Sprinklers Keep Working
A French drain is not maintenance-free, and neither is the irrigation system around it. Twice a year, ideally at spring startup and before the first freeze, do a short walkthrough:
- Flush the drain with a hose and confirm flow at the exit point
- Clear the pop-up emitter of grass clippings and mulch
- Run each sprinkler zone and look for heads tilted or buried by settled trench soil
- Check the backflow preventer and valves before freeze season, since North Texas cold snaps crack both
Pairing the drain check with your seasonal sprinkler visit makes sense, because the two systems fail in ways that mimic each other. A well-managed irrigation system also wastes far less water; according to U.S. Environmental Protection Agency (EPA WaterSense), a household irrigation system that is well managed can cut irrigation water use by 15 percent, nearly 7,600 gallons annually. For a new-build owner still learning a mystery system, one inspection that covers zones, controller settings, and drainage gives you the full picture at once.
If the standing water sits against your foundation, involves more than one low area, or your lot has no clear downhill exit, bring in a professional before you commit to a weekend of digging. Done right, a french drain system installation in Plano clay should quietly move water for a decade or more. Done wrong, it is a trench full of clogged gravel that you get to dig up twice.
If you need french drain installation, North Dallas Sprinkler Repair can help.
Related guide: french drain installation — Complete Guide
Prefer to talk it through? Call (469) 639-1022 — a quick call is usually the fastest way to get a straight answer for your situation.